Relocation of Abergavenny Art Studio,
from Western Australia to Tasmania.
2020
Update...after a nine year Tasmanian adventure I have moved back to Western Australia.
2011
'Moved'...lock, stock & barrel!
After an adventurous, difficult and lengthy move from the 'hot' suburbs of WA in September 2011, I am now settled in to the 'cool' and very beautiful country town of Deloraine, in Tasmania. I still can't believe I am living on this stunning island!
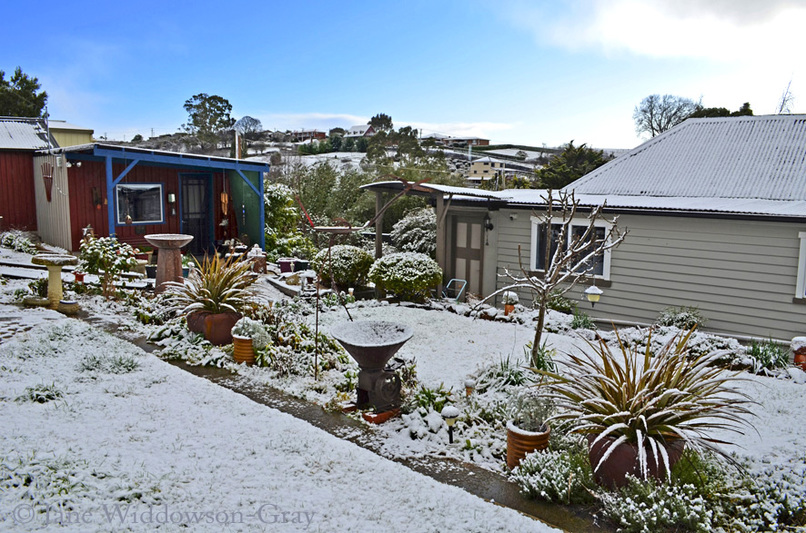
My property, which is situated on a hill with lovely views of the surrounding countryside,
has a quaint renovated 1880's cottage, set in a peaceful cottage garden.
It has an abundance of garages and sheds and so
I have converted one of them in to a wonderful new art studio.
This has taken 3 months to complete (due to the Christmas break) and I have just moved in.
But, before I can get back to business,
I have decided to extend the studio, by converting the adjoining garage,
linking up two buildings, as it will allow more workspace and room for display.
Deloraine is 40 minutes from Launceston and is the largest inland town in Tasmania.
For visitors to Deloraine, Studio visits are welcome by appointment.
'Moved'...lock, stock & barrel!
After an adventurous, difficult and lengthy move from the 'hot' suburbs of WA in September 2011, I am now settled in to the 'cool' and very beautiful country town of Deloraine, in Tasmania. I still can't believe I am living on this stunning island!
My property, which is situated on a hill with lovely views of the surrounding countryside,
has a quaint renovated 1880's cottage, set in a peaceful cottage garden.
It has an abundance of garages and sheds and so
I have converted one of them in to a wonderful new art studio.
This has taken 3 months to complete (due to the Christmas break) and I have just moved in.
But, before I can get back to business,
I have decided to extend the studio, by converting the adjoining garage,
linking up two buildings, as it will allow more workspace and room for display.
Deloraine is 40 minutes from Launceston and is the largest inland town in Tasmania.
For visitors to Deloraine, Studio visits are welcome by appointment.
New Art Studio 2011/2012
Work in progress:
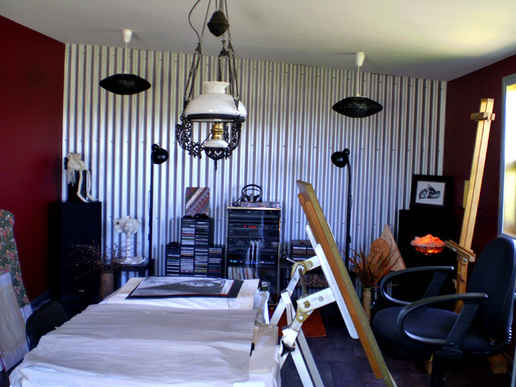
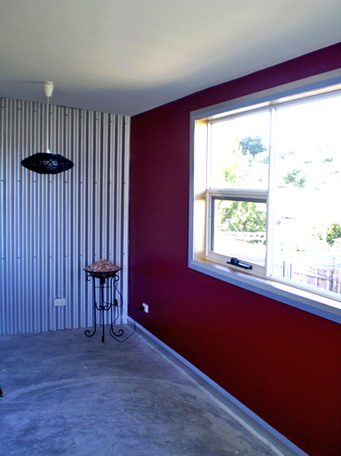
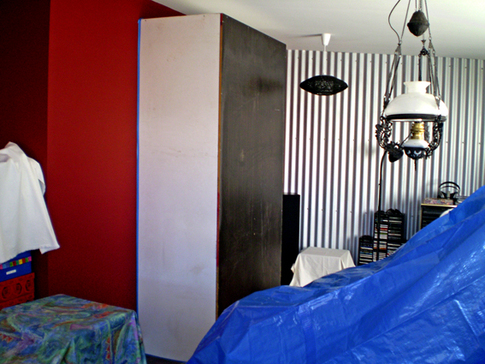
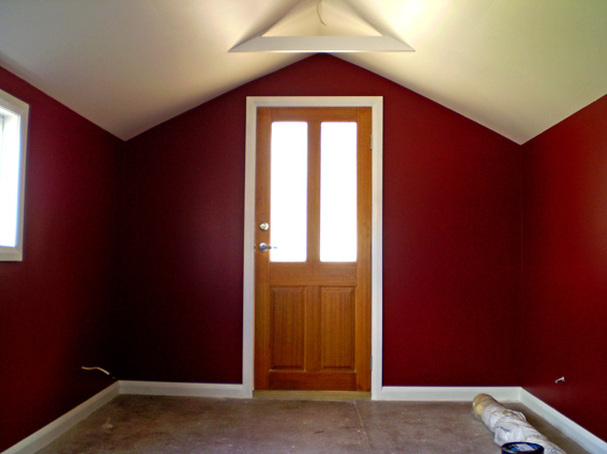
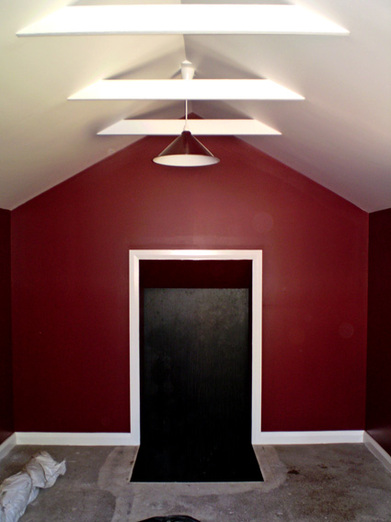
My new studio is currently receiving its finishing touches. It is minus my artwork until the picture rails are in place, to hang them on, which I have painted maroon and silver to match the wall colour.
The Dutch, weighted, hanging lamp was from my former Art Gallery in Western Australia. It has been stored away for 6 years, but I am so pleased that I have kept it, to be reused and enjoyed again.
The new section will be on the left, with a doorway cut in to the wall, for access.
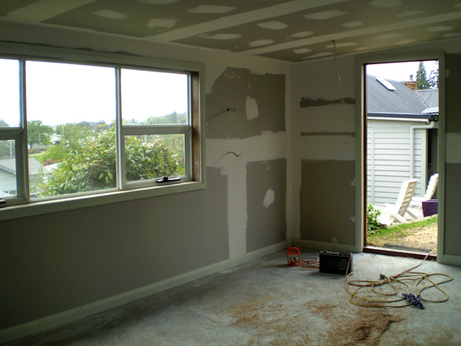
It is hard to believe this was a dirty, very old, auto workshop.
With many thanks to my wonderful builder Jason, who is nothing short of brilliant!
Builder; Jason Griffith Cabinet Making
Deloraine, Tasmania.
Mobile: 0417 522 276
My new studio is currently receiving its finishing touches. It is minus my artwork until the picture rails are in place, to hang them on, which I have painted maroon and silver to match the wall colour.
The Dutch, weighted, hanging lamp was from my former Art Gallery in Western Australia. It has been stored away for 6 years, but I am so pleased that I have kept it, to be reused and enjoyed again.
The new section will be on the left, with a doorway cut in to the wall, for access.
It is hard to believe this was a dirty, very old, auto workshop.
With many thanks to my wonderful builder Jason, who is nothing short of brilliant!
Builder; Jason Griffith Cabinet Making
Deloraine, Tasmania.
Mobile: 0417 522 276
Studio window
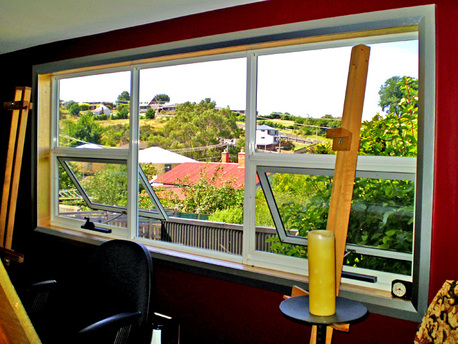
I chose silver paint for the window frames and skirting boards, to match the feature
wall of corrugated iron, then painted gold on the inside of the
windows.
It has a lovely, peaceful, view of the hills.
It has a lovely, peaceful, view of the hills.
From the beginning...
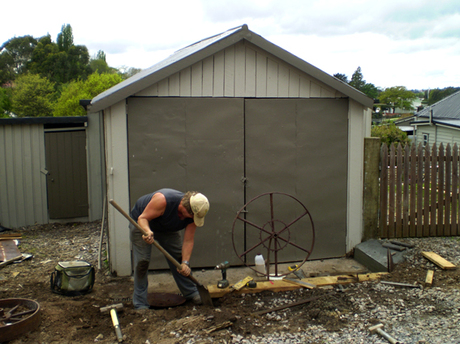
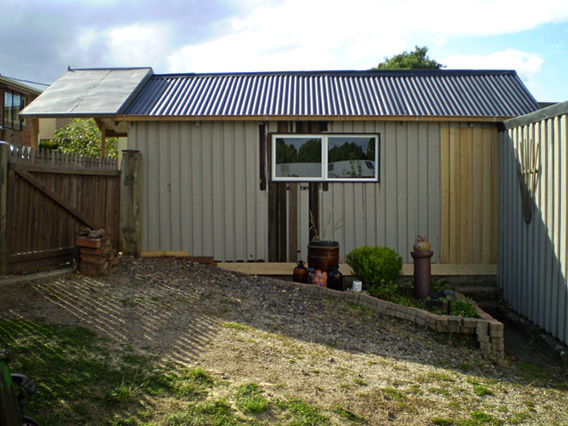
Building the studio; converting first garage.
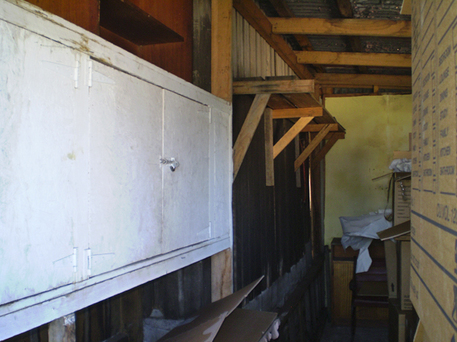
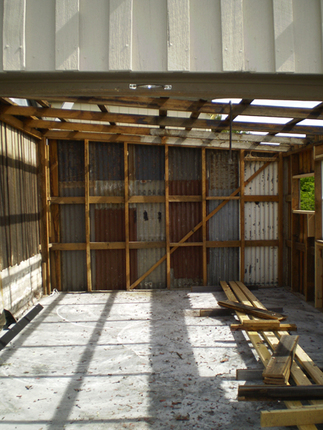
Part of the old work shed.
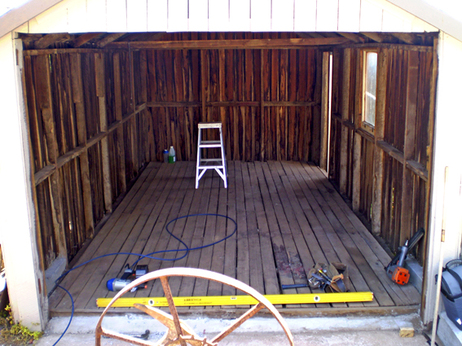
Left hand side of shed...
an opening will eventually be cut in to this wall to build
another, adjoining, studio.
Left hand side of shed...
an opening will eventually be cut in to this wall to build
another, adjoining, studio.
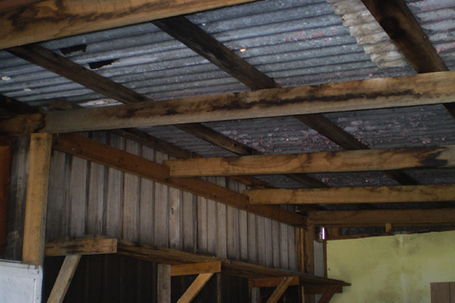
The iron roof is in very poor condition, but timber beams are sound.
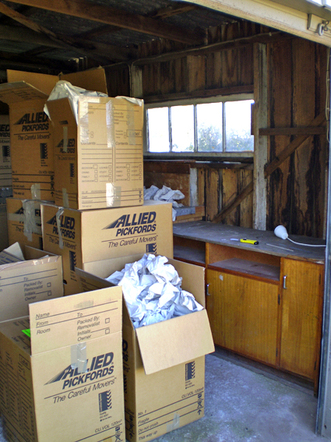
Right side of shed...
Two small old windows will be removed to make way for a larger one.
Two small old windows will be removed to make way for a larger one.
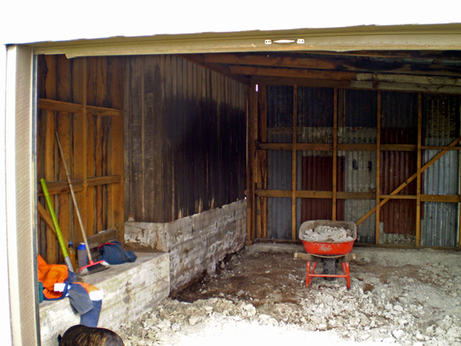
24 October 2011
Renovations start. Cupboards and workbenches are
removed. The old and badly cracked concrete floor, is jack-hammered and rubble removed, ready for the new concrete slab to be poured.
Renovations start. Cupboards and workbenches are
removed. The old and badly cracked concrete floor, is jack-hammered and rubble removed, ready for the new concrete slab to be poured.
.
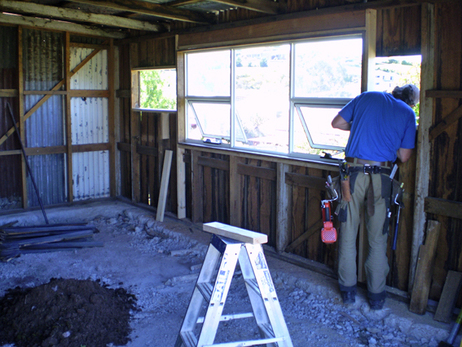
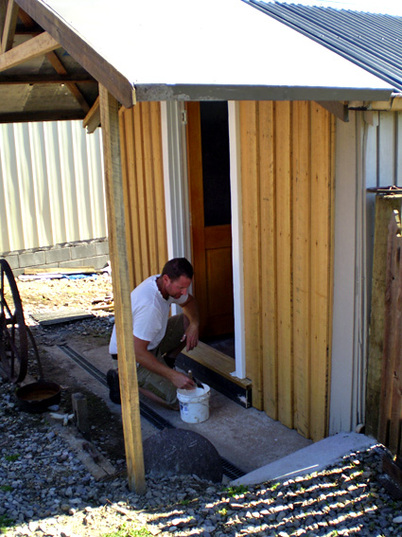
25 October
Jason & Tim have removed the two windows and Jason (pictured) is fitting a larger one.
(In the final stages of building, Polycarbonate is fitted over the windows to act as a form of double glazing.)
Jason & Tim have removed the two windows and Jason (pictured) is fitting a larger one.
(In the final stages of building, Polycarbonate is fitted over the windows to act as a form of double glazing.)
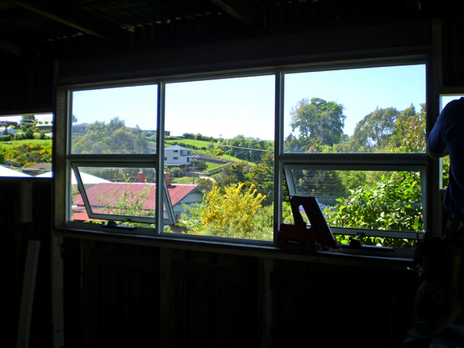
The new view.
The old view is through the windows on either side, which are eventually covered over.
The old view is through the windows on either side, which are eventually covered over.
.

New concrete slab
.
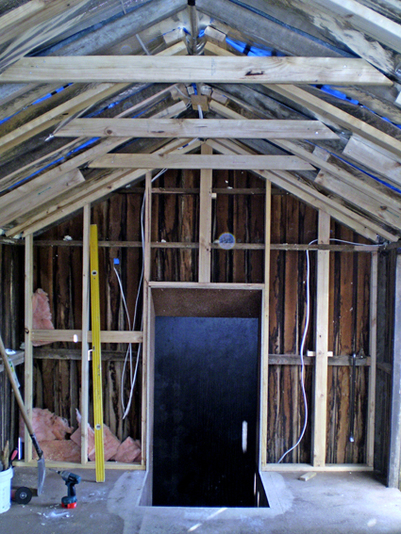
Old rusty iron roof is removed.
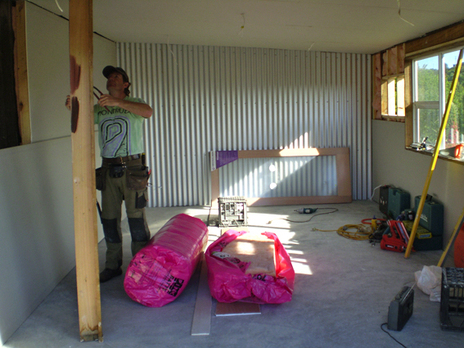
New roof has been completed and insulation placed in the walls and roof.
Electricians have been & gone.
Wires have been laid behind the walls...and ceiling for 5 hanging lights.
Jason is now in the process of fitting the plasterboard.
The feature wall is corrugated iron.
(I didn't like the door 'shown', so used a recycled one for the front entrance instead...see below.)
Electricians have been & gone.
Wires have been laid behind the walls...and ceiling for 5 hanging lights.
Jason is now in the process of fitting the plasterboard.
The feature wall is corrugated iron.
(I didn't like the door 'shown', so used a recycled one for the front entrance instead...see below.)
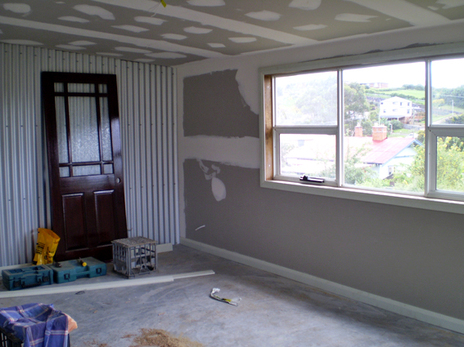
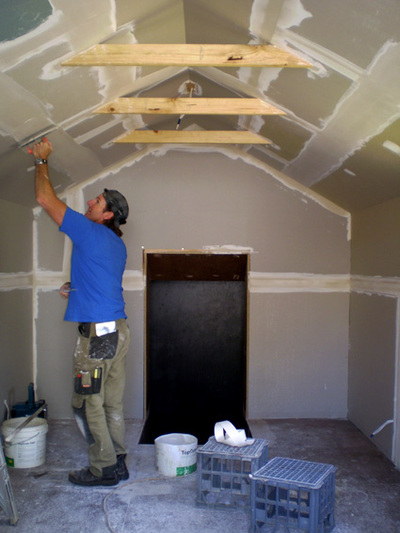
Sealing the plasterboard joins.
My recycled door...it has much more character than the one above, with frosted cut glass.
My recycled door...it has much more character than the one above, with frosted cut glass.
This corner looks small but it is actually big enough for both my computer desk and filing cabinet.
Draughtsman's drawers and drawing board will be under the window.
Draughtsman's drawers and drawing board will be under the window.
Painting is finished, hanging lights fitted.
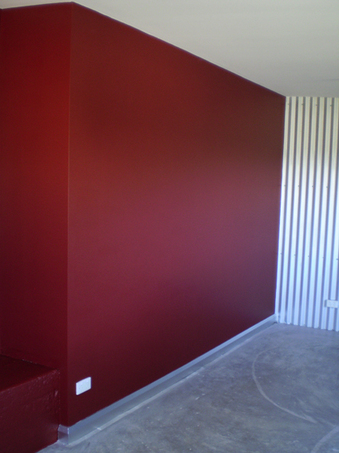
This wall is eventually cut in to, to make a doorway.
It looks bare here but ends up looking very different.
See doorway with gate when you reach the end of this page.
It looks bare here but ends up looking very different.
See doorway with gate when you reach the end of this page.
Finishing touches...vinyl flooring with a slate look finish.
It is a bit soft and marks easily, but looks great and is warmer than a tiled floor.
Best to kick off your outdoor shoes with this flooring, to avoid stones being brought in!
It is a bit soft and marks easily, but looks great and is warmer than a tiled floor.
Best to kick off your outdoor shoes with this flooring, to avoid stones being brought in!
New project; converting second garage.
After my studio was completed and some of my art gear etc was brought in from my top shed, I realised that I wasn't going to have enough room.
It is not only an Art & Photography Studio/workplace, but an office, packaging room and music room...and there just wasn't enough room for displaying artwork and my large Card & Print stands.
As there was an adjoining shed above my studio I decided to bite the bullet and here we go again!!!
'Studio number two.'
Digging a trench and placing a drain for storm water.
Making a rustic entrance.
The garage doors seen here are recycled later.
.
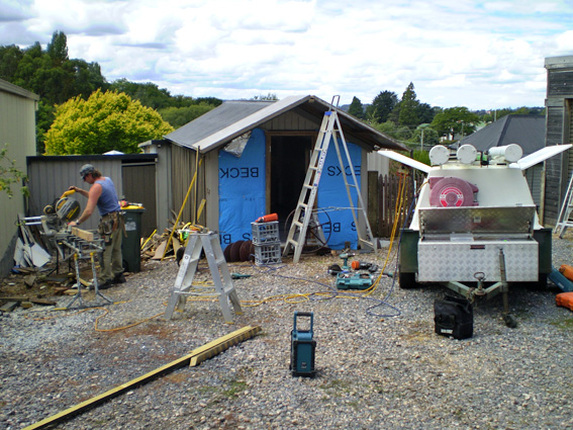
24 January 2012
After a long discussion about what to do with this vintage timber shed, building starts on the second renovation...
I had removed the contents and cleaned out what must have been 100 years of dust and cobwebs.
The garage doors are removed and the wonky, original, wooden floor was nailed back in to place, to become a solid base for the new floor.
.

Wooden beams were made to fit horizontally across the timber floor at different thickness's, to level what was
a sloping floor.
.

25 January
Gaps in the walls have been filled with expandable foam.
Floating floor is fitted.
Gaps in the walls have been filled with expandable foam.
Floating floor is fitted.
.
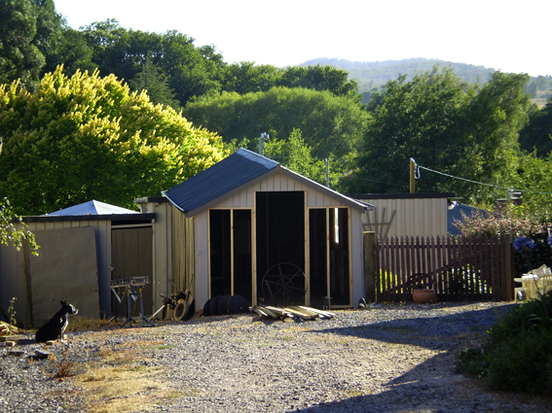
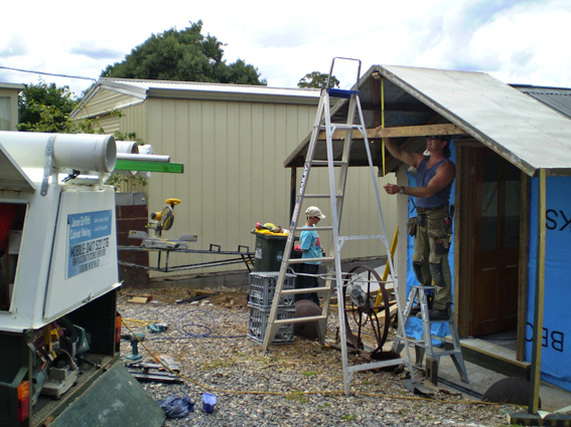
The structure has been made for the front entrance of the new extension.
Looking very cute!
My newly completed studio can be partly seen, from behind this building, to the right. Steps will lead from inside the front building to the studio below.
On the left is a wood shed.
Building recommences on Monday 30 January.
Looking very cute!
My newly completed studio can be partly seen, from behind this building, to the right. Steps will lead from inside the front building to the studio below.
On the left is a wood shed.
Building recommences on Monday 30 January.
.
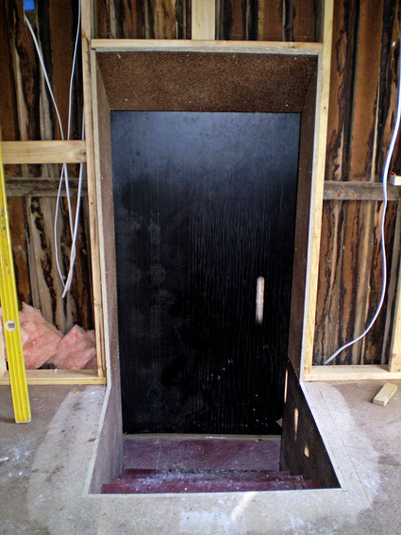
30 January-2 February
Dust box
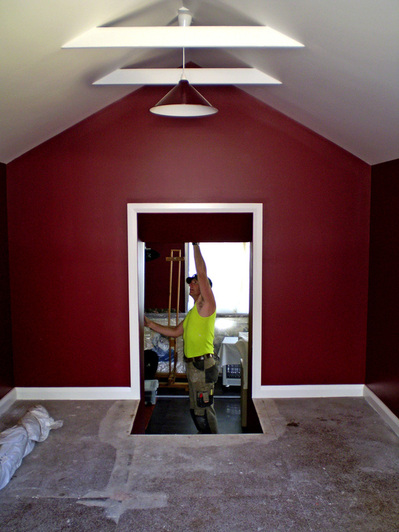
Jason has made a box to cover the opening, (which has been cut in to the wall and leads from my studio up in to the new extension), to prevent dust from coming in while they work in the old shed above.
Dust box
Jason has made a box to cover the opening, (which has been cut in to the wall and leads from my studio up in to the new extension), to prevent dust from coming in while they work in the old shed above.
.
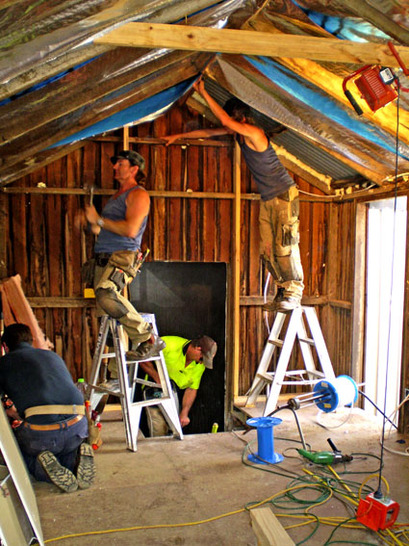
From left to right...
Mark (Electrician), Jason (builder), Tim & Reece...all busy, busy, busy.
Mark (Electrician), Jason (builder), Tim & Reece...all busy, busy, busy.
.
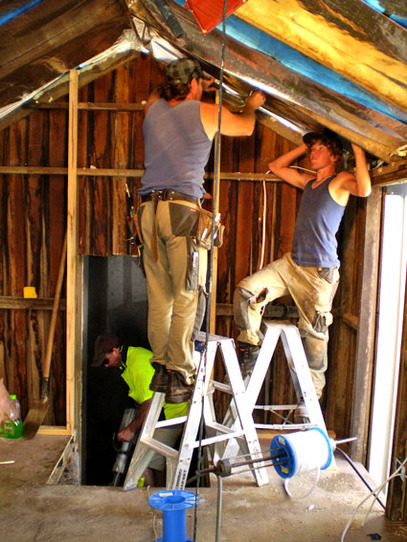
A section of the back wall has been removed.
The back of the protective dust-box in the studio below can be seen, it will be very exciting when it is all finished and the box is removed to expose the lower studio.
Another section was cut, out of the new floor, to make way for the steps.
The concrete wall under the building is jack-hammered and removed, along with a ton of dirt.
Wires are laid for the electric lights and power points.
Insulation is being installed.
.
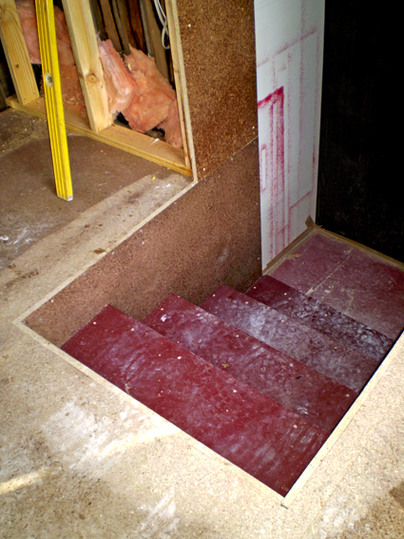
The steps are made; with floorboards that were left over from building my former gallery, in Western Australia, 15 years ago.
The wood is really strong and solid, so instead of throwing the boards away when I moved, I decided to put them in to the side of my sea containers when transporting my belongings to Tasmania...and they have now been put to good use.
A Tasmanian studio with Western Australian steps.
The wood is really strong and solid, so instead of throwing the boards away when I moved, I decided to put them in to the side of my sea containers when transporting my belongings to Tasmania...and they have now been put to good use.
A Tasmanian studio with Western Australian steps.
.
A sloping roof has been made, to allow headroom for tall people!
.
A safety rail & wooden gate will be made around the entrance to the steps.
.
6 - 8 February
Plasterboard has been fitted and Jason is plastering over the joins.
Plasterboard has been fitted and Jason is plastering over the joins.
.
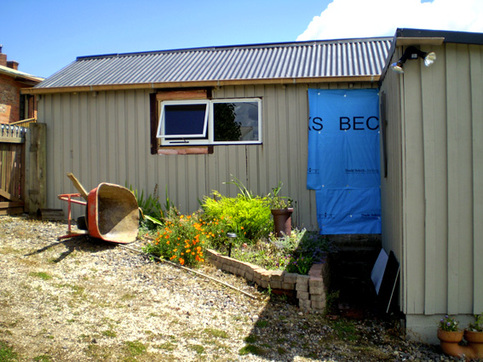
Side of shed, new extension; old broken window has been removed and a
larger window fitted, to allow light and ventilation at a workbench area inside.
Old door is removed and the open space will be closed in.
Garden bed will be partly removed so that water is not too close to the wooden building. Steps and side path will be replaced with a storm water drain, to prevent rainwater from seeping in to that area.
Old door is removed and the open space will be closed in.
Garden bed will be partly removed so that water is not too close to the wooden building. Steps and side path will be replaced with a storm water drain, to prevent rainwater from seeping in to that area.
.

Entrance door has been fitted, skirting boards and door frame.
There are no cornices on either side of the building, as Jason very cleverly cracked and folded (instead of cut) the plasterboard, from one sheet either side instead. That meant that there were no joins to cover.
There are no cornices on either side of the building, as Jason very cleverly cracked and folded (instead of cut) the plasterboard, from one sheet either side instead. That meant that there were no joins to cover.
.
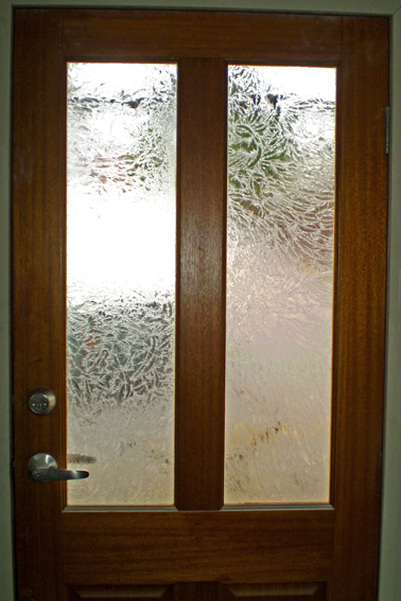
Recycled second hand door with new locks.
.
February 9
Building the porch.
Building the porch.
.
Recycling at its best!
Instead of purchasing new materials to build a porch, Jason has recycled the old original garage doors to make a shelter for the entrance.
This will be painted blue later.
Instead of purchasing new materials to build a porch, Jason has recycled the old original garage doors to make a shelter for the entrance.
This will be painted blue later.
.
New porch is complete.
Wooden beams for the structure are also recycled, taken from the building material rubbish (pictured on the left) and sanded.
Wooden beams for the structure are also recycled, taken from the building material rubbish (pictured on the left) and sanded.
.
15 February
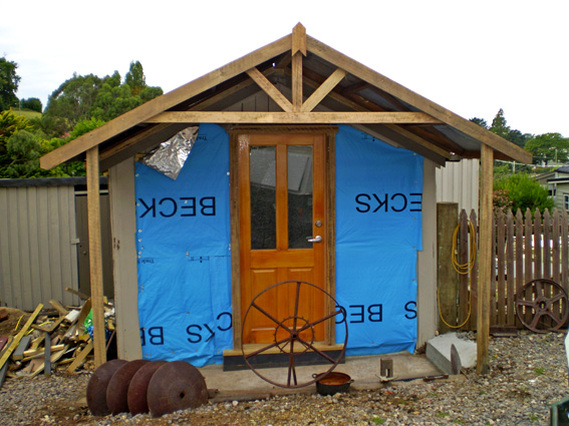
Wood purchased from a timber mill, has been used to fill in the front wall. It compliments and closely matches the walls of the old timber building.
Wood purchased from a timber mill, has been used to fill in the front wall. It compliments and closely matches the walls of the old timber building.
.
The old doorway has been filled in.
Wood around the window frame has been replaced with recycled timber from the building.
A new plank of wood has been added to the bottom of the building, where some old rotten wood was removed.
This side is finished and ready to be painted.
I have removed the brick pathway ready for the drain and pulled out most of the garden, leaving only a small selection of plants, away from the timber building, with a few garden ornaments.
Painting inside commences Thursday 16 Feb.
.
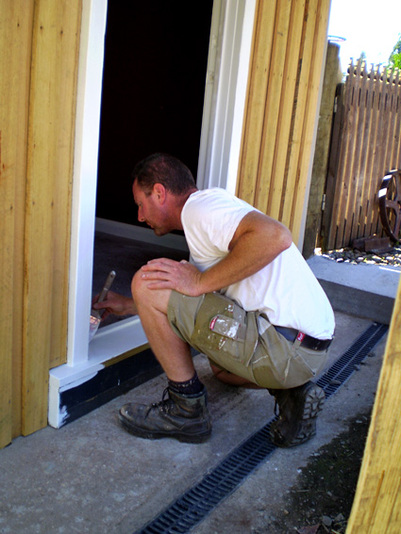
16-25 February
Preparing the step ready to be weatherproofed.
Preparing the step ready to be weatherproofed.
.
.
Front entrance.
Paintwork is almost completed inside.
Paintwork is almost completed inside.
.
Electricity is connected.
Colours are to match and compliment the studio below.
This section is simply maroon & white because it
will have many different colours
when the furniture and artwork is added.
The slate coloured, rustic look, vinyl has arrived and will be laid next week, the dust box will be removed then the safety gate is to be made above the steps. Almost there!
March 1st, 2012.
The second section of my studio was completed today.
It is a terrific workspace but I am too exhausted to write about it,
the last few days were full on with fine tune organizing to finish it all on schedule.
Now the cleaning, unpacking and decorating (the fun part) starts.
It has been one year since I first came to Tasmania to find a property and it has been non-stop
packing, moving, unpacking and renovating for the whole year.
More updates soon!
March 10...very busy preparing the studio for the opening.
March 17...The house warming/studio opening, at the end of this month,
is to thank all involved with the making of the studio.
.
March 6
Final studio updates.
Removing the dust box,
to reveal the studio on the lower level.
Final studio updates.
Removing the dust box,
to reveal the studio on the lower level.
.
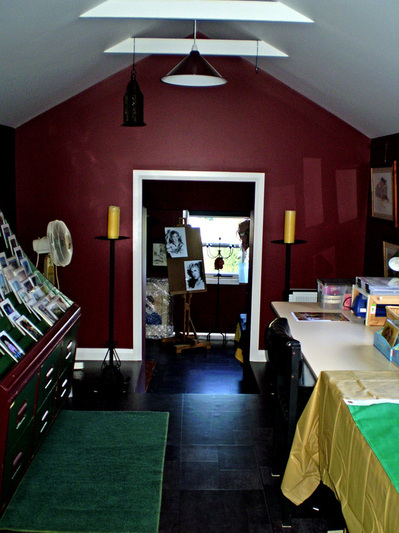
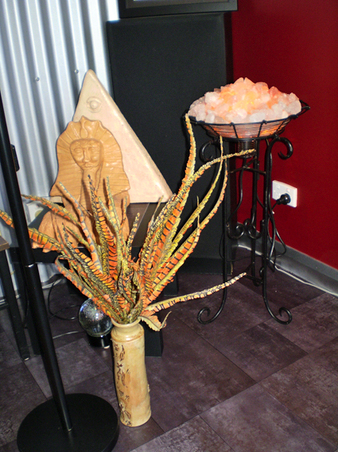
The finishing touches!
Display shelves and work benches are brought in, picture rails are fitted to both studios.
The large candle holders, I brought with me from WA, are made out of Rio reinforcement rods for concrete.
Before the safety gate...
As the vinyl is all the same colour, in the top studio, on the steps and in the lower studio, you couldn't see the steps so a safety gate was fitted...see below.
.
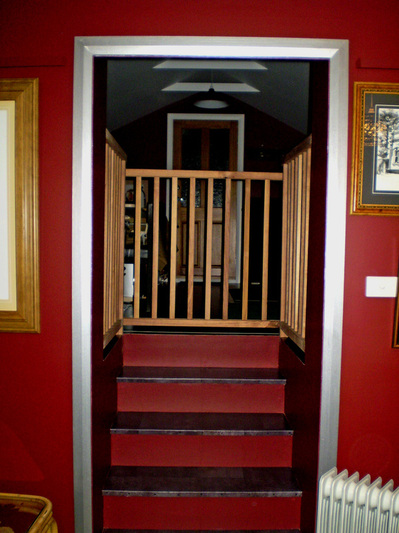
From the lower studio looking up to the new top studio...
The safety gate over the steps.
A 'squeaky' self-closing hinge (which has the same sound as opening an old fly screen verandah door) has been used for the gate. I have 'been told' I am not to oil the squeaky gate, as it adds to the character of the building.
The wood is called Blackwood and is ready to be varnished.
Footnote;
I used a natural varnish, not gloss, so that the wood retained its natural timber look, (like polished wood) but goodness does it stink.
Beware as you need a good mask. I had a normal mask and all doors were open for ventilation, but the fumes got through in to my lungs and chest and stayed there burning, all night.
March 31st.
Studio opening/House warming.
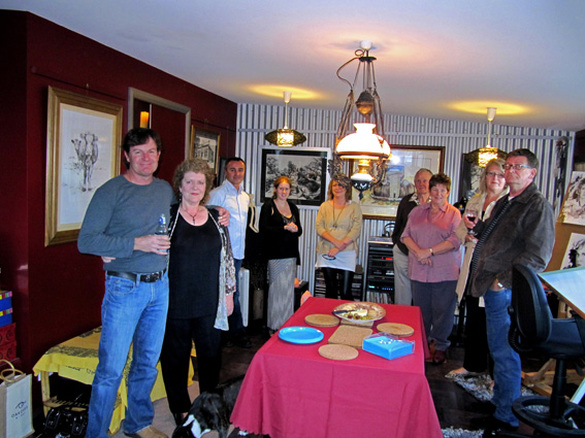
Left to right...Jason (builder), Jane (me), Daryl (Harcourts), Jess, Donna (Harcourts), Ken & Jeanette (Alpacha/Corner Crafts,) Anne & Gary (Woodturner/Corner Crafts).
Many thanks to everyone who attended my opening and have welcomed me to Deloraine.
To all involved with building my studio, you have all done a 'wonderful' job, thank you so much...especially Jason & Tim.
Daryl & Donna from Harcourts Real Estate, thank you for your very friendly and helpful advise in choosing the best property, to suit my proposed business and lifestyle.
A cozy, 130 year old, completely renovated character cottage, (with pressed tin ceilings) for my home...and 3 garages & 2 sheds to renovate as a workplace...in a commercial zone, only 3 minutes walk from town and all with a lovely view. Just perfect!
.
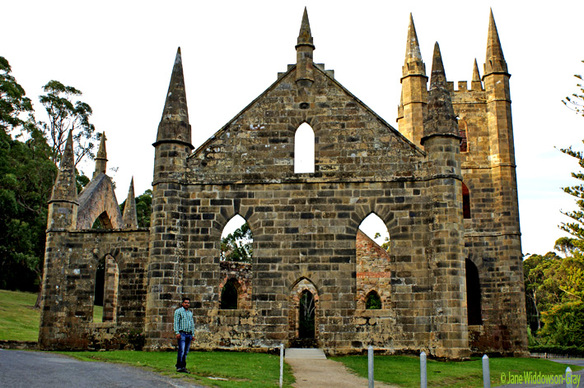
Last but not least, to my adopted Indian son Narsimha, (pictured) a very big thank you for all your support and for your help with the last minute painting job we tackled...and for the 'fun and very interesting' week of travelling around, (many hundreds of miles) taking photographs of this beautiful Island, Tasmania.
Narsimha at church ruin, historical site, Port Arthur, Tasmania.
Narsimha at church ruin, historical site, Port Arthur, Tasmania.
September 3, 2012
My first winter in Tasmania has been long and harsh, very wet & extremely cold, with frosts and snow on the mountains.
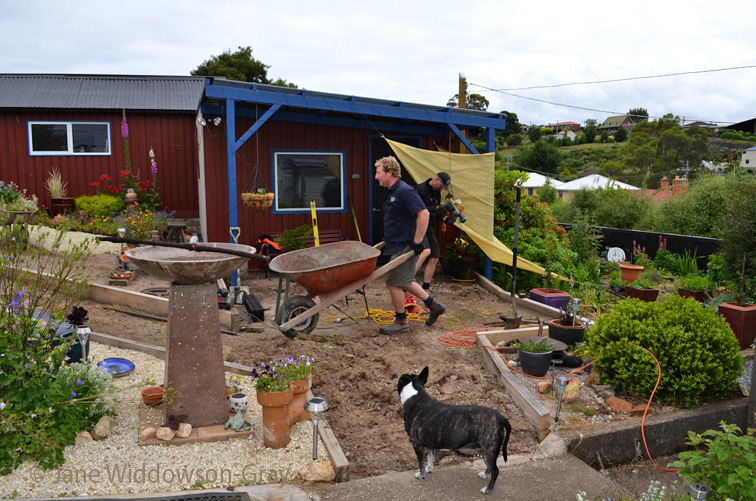
So to keep the mud and water from getting inside my studio, (especially from my Staffies little paws), work starts today on a patio for the entrance to the lower studio. A path is also being laid.
Painting outside is almost complete. More photos soon!
Because of a busy workload; supplying my outlets, eBay, my Website and Photography, I have decided to keep the studio as a working studio, which is closed to the general public.
More Photo Shoot trips are planned around Tasmania, including the Tulip Farm in October.
November 1, 2012
Before...Auto Workshop & Shed
and
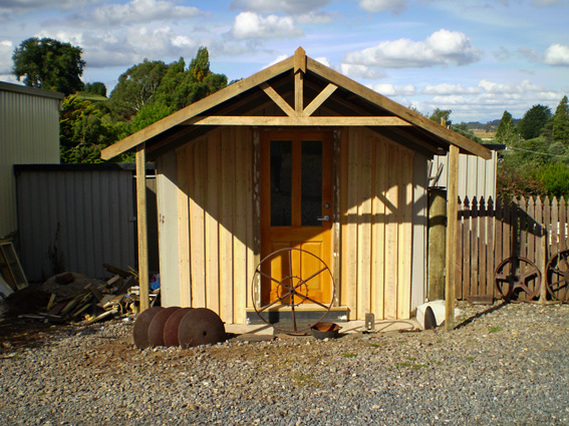
After...Art Studio


Before...close up
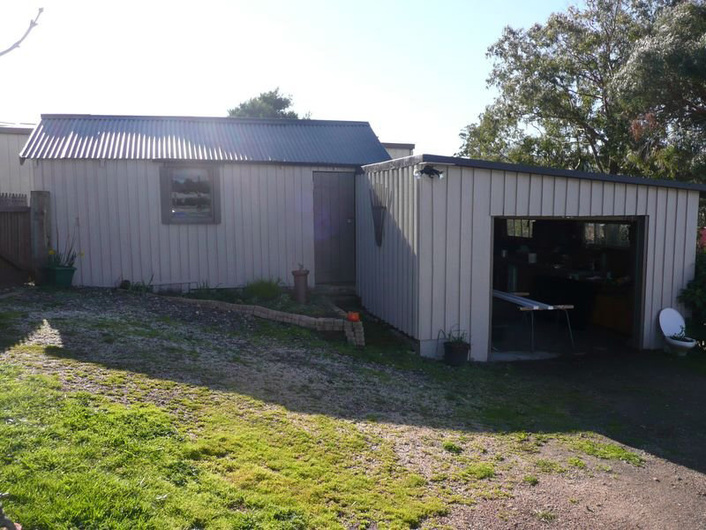
Real estate photo.
This photo was taken before I purchased the property.
This photo was taken before I purchased the property.
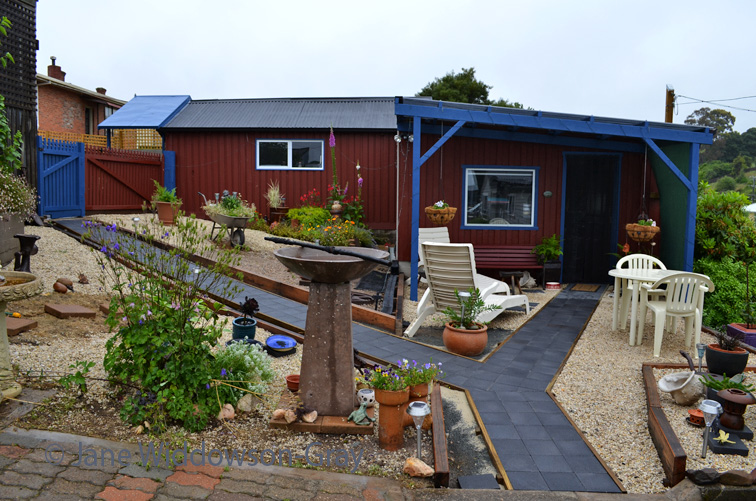
After
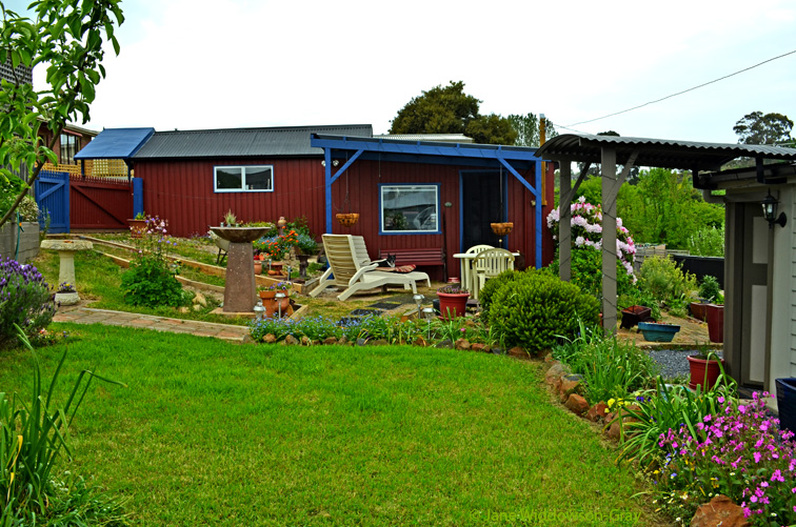
The new patio is completed. The roof is tinted polycarbonate, see-through to let light in to the studio.
Painting is finished, I painted as much as I could through the winter, frozen right through to the bone at times.
Yellow fairy lights light up the front of the studio at night (top left past the blue gate) and blue fairy lights around this section, with solar lights throughout the garden area. Very pretty and magical at night!
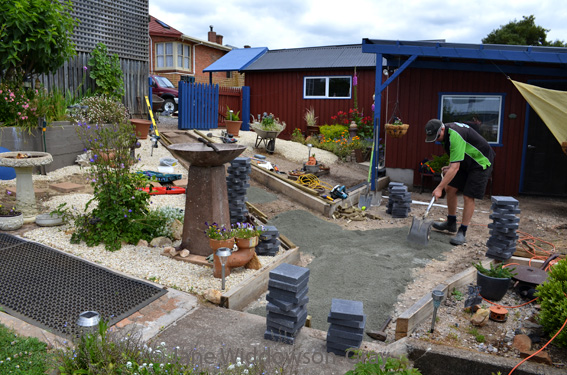
The timber edging has been laid for a pathway. In December 2012 pavers & pebbles will complete the job.
My dog enjoys sitting on the sun-lounge, (pictured). I never get the time. Its a dogs life!
Painting is finished, I painted as much as I could through the winter, frozen right through to the bone at times.
Yellow fairy lights light up the front of the studio at night (top left past the blue gate) and blue fairy lights around this section, with solar lights throughout the garden area. Very pretty and magical at night!
The timber edging has been laid for a pathway. In December 2012 pavers & pebbles will complete the job.
My dog enjoys sitting on the sun-lounge, (pictured). I never get the time. Its a dogs life!
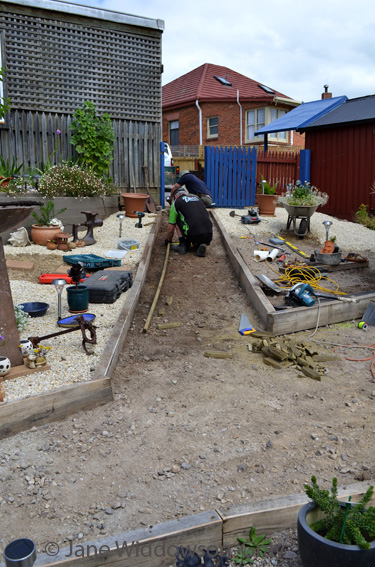
Laying the path & pebble garden.
Click on pictures below to view larger images.

2013
Meet Galadriel
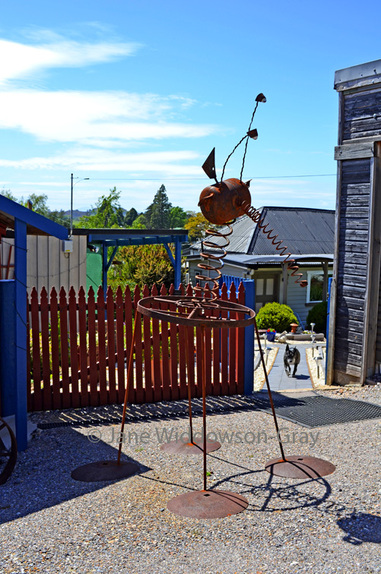
Galadriel is Androgynous, (neither male nor female). It greets you at the entrance to my home.
If you pull its snout its head wobbles and keeps going...and going.
It has long feeler eyes, (the eyeballs are large marbles, from some of my children's old toys...that is why I never throw anything away.)
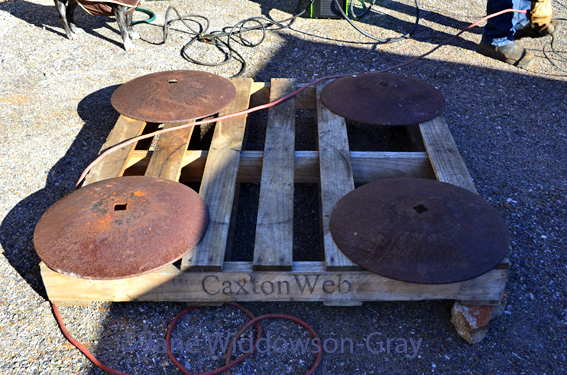
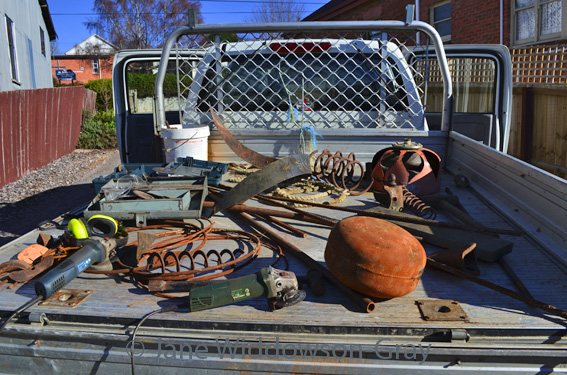
The tummy (wagon wheel) and huge feet (tractor plough discs) were also brought from Western Australia.
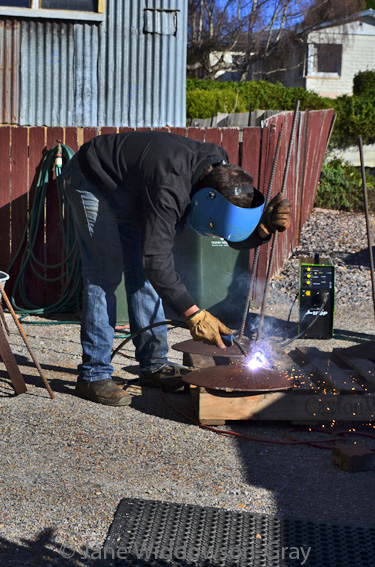
I had a vision of the alien-like creature that I wanted created and commissioned Zane, (metal art sculptor), to make it for me. I made a sketch and then we put two heads together.
Zane collected some more bits for me to choose from.
I wanted the wheel tipped forward so that it can be seen, so he made the two front legs shorter, then with some more brain-storming, welded it all together.
You can imagine it is very heavy...one plough disc on its own is heavy.
It was great fun to create with Zane and Sally.
Many thanks to you both!
Zane Mackean, metal art sculptor.
If you pull its snout its head wobbles and keeps going...and going.
It has long feeler eyes, (the eyeballs are large marbles, from some of my children's old toys...that is why I never throw anything away.)
The tummy (wagon wheel) and huge feet (tractor plough discs) were also brought from Western Australia.
I had a vision of the alien-like creature that I wanted created and commissioned Zane, (metal art sculptor), to make it for me. I made a sketch and then we put two heads together.
Zane collected some more bits for me to choose from.
I wanted the wheel tipped forward so that it can be seen, so he made the two front legs shorter, then with some more brain-storming, welded it all together.
You can imagine it is very heavy...one plough disc on its own is heavy.
It was great fun to create with Zane and Sally.
Many thanks to you both!
Zane Mackean, metal art sculptor.
The making of Galadriel

Front entrance to studio
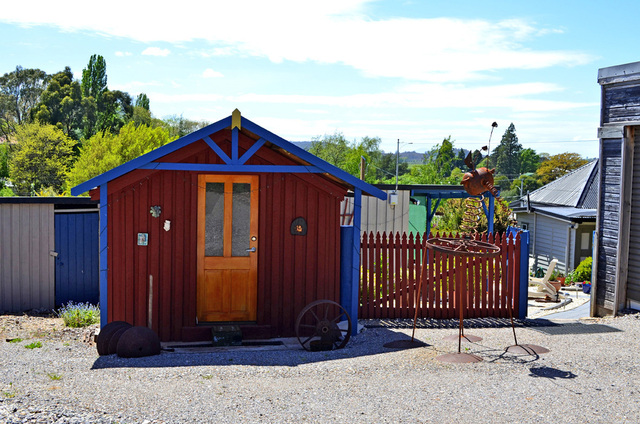
This entrance was changed in 2013.
Two wooden railway sleepers have been used as steps, which lead down to the front door.
A gravel pathway has been levelled by a Grader, down one side of the long driveway and in front of the studio. It was originally very rough stone and difficult to walk on.
The pathway has been scooped away in front of the building, to divert any rainwater away...after my studio was flooded (and what a disaster that was.)
The drainage that I had put in wasn't enough for a wild storm. More storm water and Ag drains have been placed around the perimeter of the building.
Past the gate; the path to the lower studio and pebble garden are complete.
2014
Well, it was a long two year project and funds have run out, but it was all worth it as it is a wonderful place to live and work.
I hope that you have enjoyed viewing this page and reading about the renovation process.
Please leave me a comment if you like it, as it would be greatly appreciated.
The End!
Well, not really. Saving up for my next project!
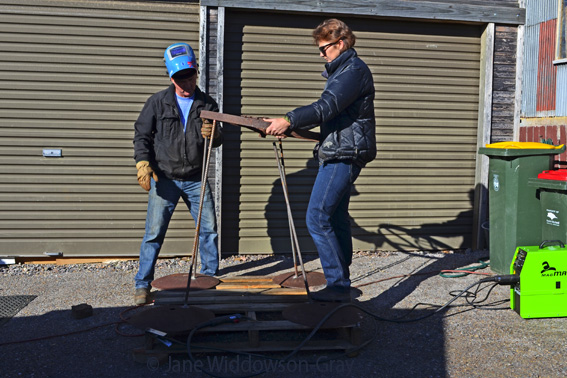
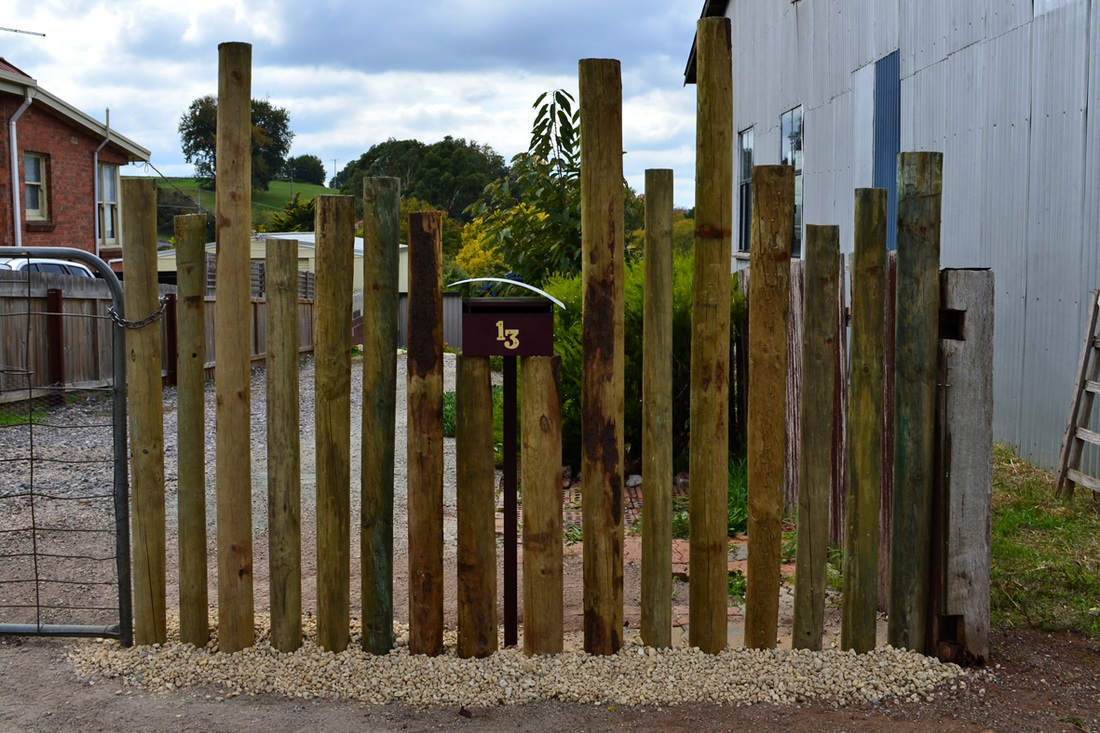
Here it is, my 2015 project!
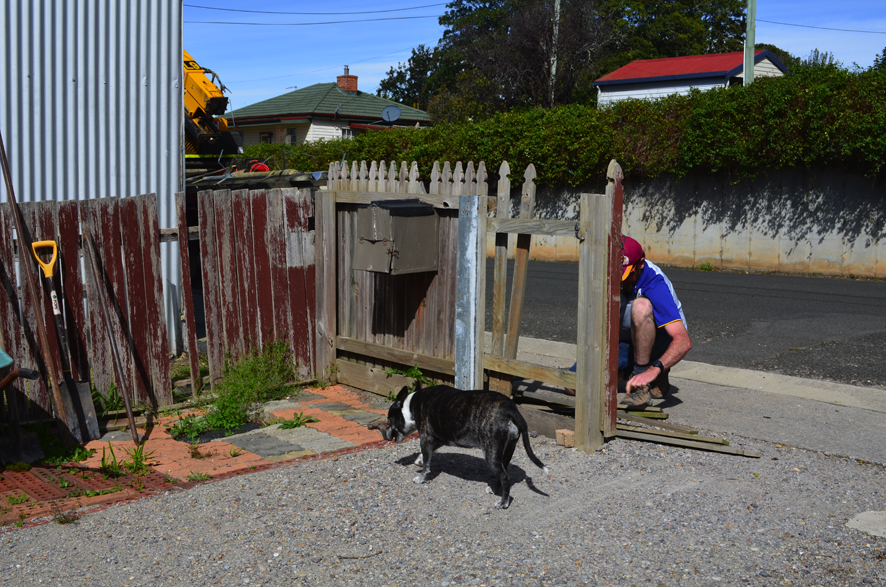
In the dark early hours, one morning a year ago, a drunk & disorderly man (a visitor to Tasmania, from Western Australia) dislodged the pickets on my old fence and damaged the letterbox. Excess on Insurance is so high that it wouldn't cover the damage so I didn't make a claim...so thanks to the young WA man for that!!! Apparently he also smashed a car window nearby and received a broken nose from the irate owner...the car owner was then promptly paid, for the damage that was caused to his car, but I wasn't. Go Figure!
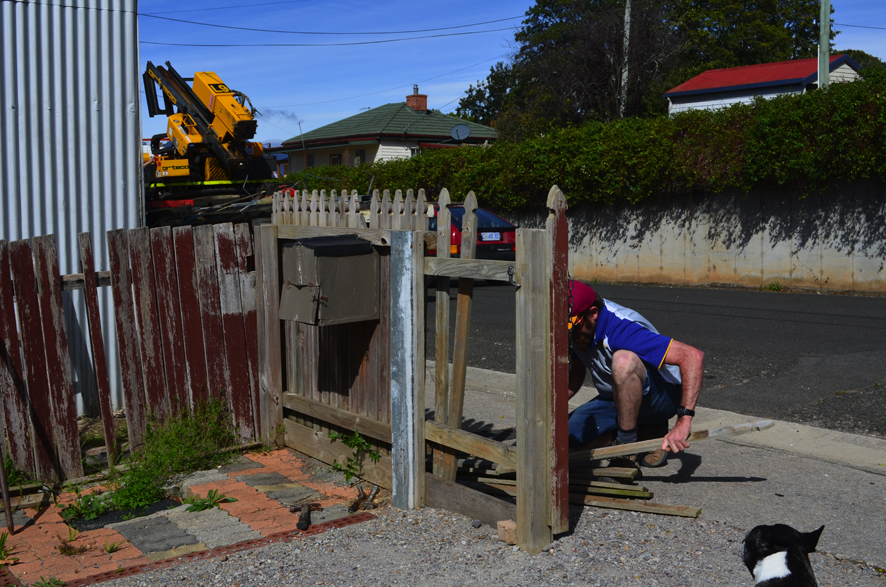
I saved up as I wanted to replace the old fence with something a bit different and had 'an idea'....but couldn't get anyone to take on the project.
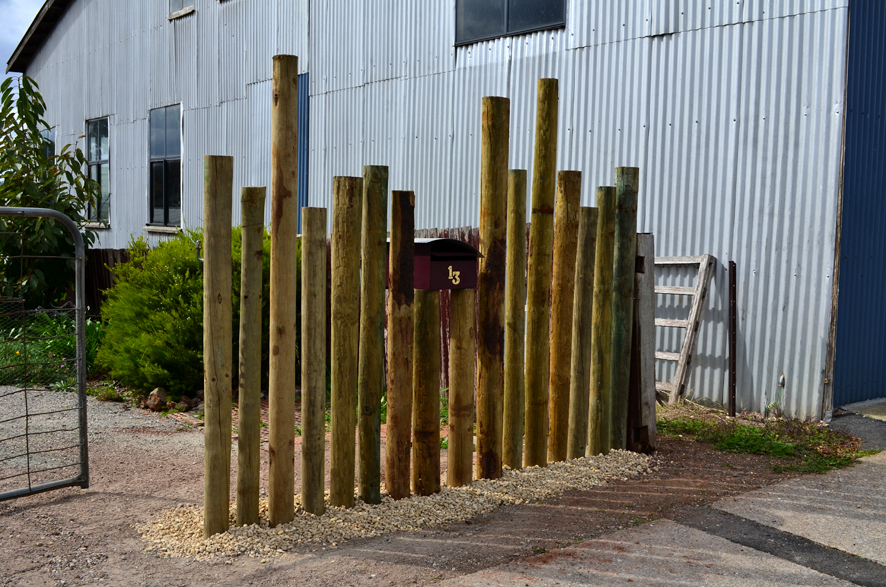
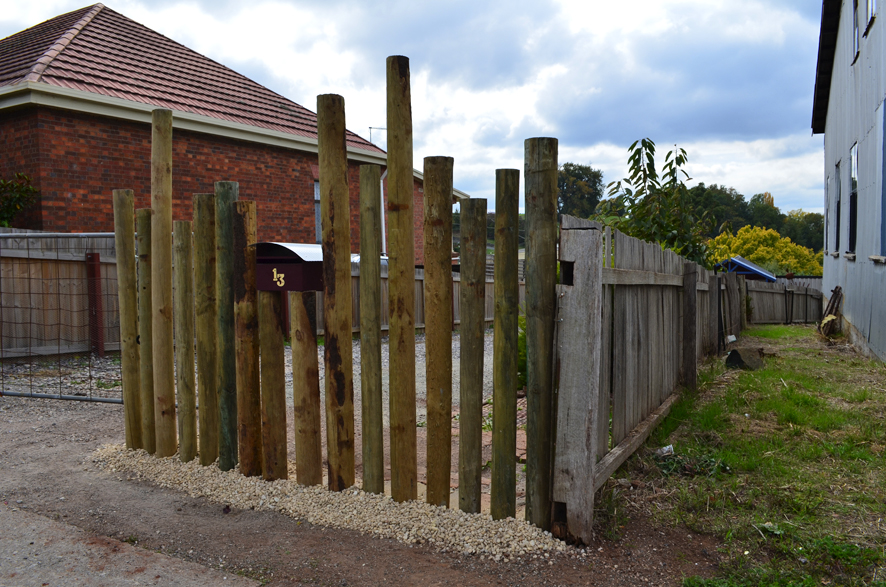
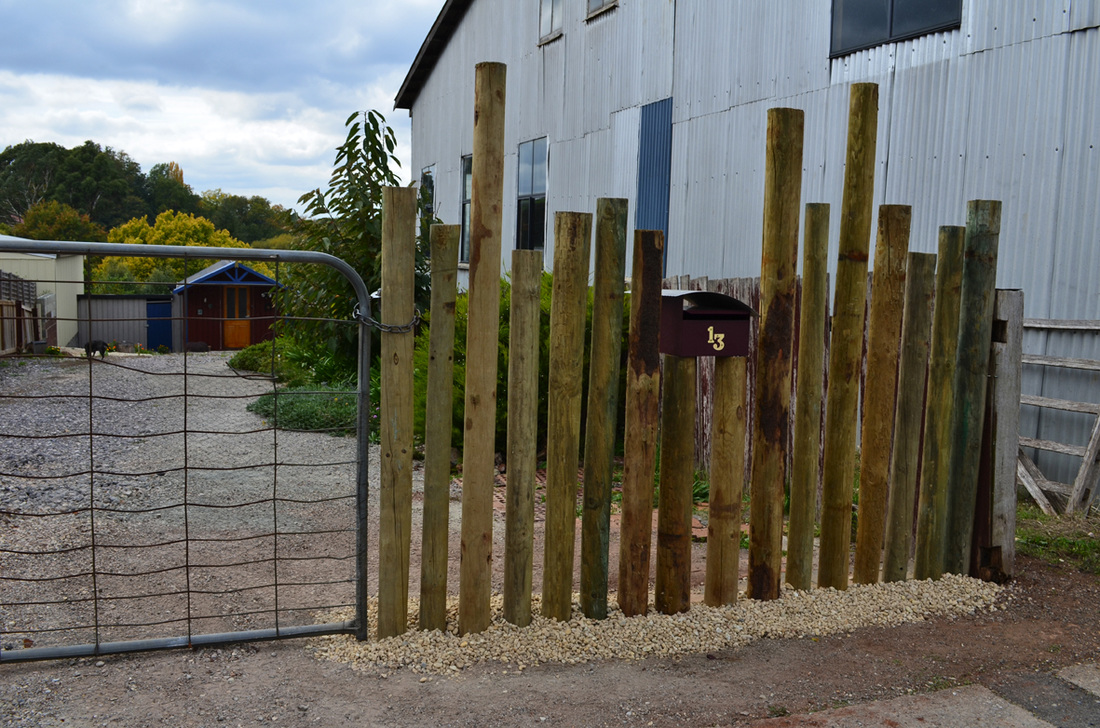
Then I discovered Randall, a local Deloraine builder who was willing to take on the job. He spent 4 hours digging a deep trench, through rock & concrete. We ordered some treated pine logs, I marked where I wanted them to be cut at different heights, with the new letterbox (same colour as my studio) in the centre. The logs and letterbox were concreted in. I had some leftover pebbles from my garden so they were used to fill in around the logs.
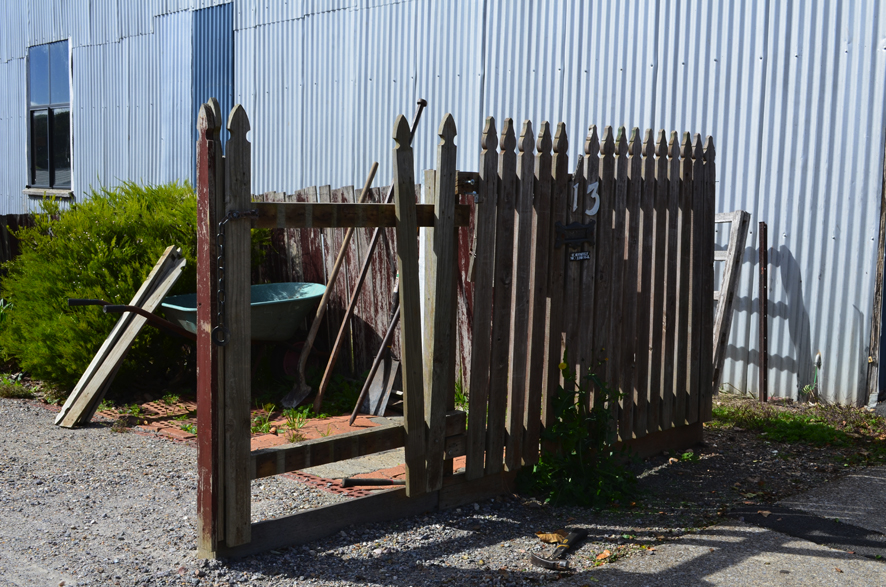
Unfortunately I live next to a disused factory so the rest of the fence, between us, will have to remain....an eyesore.
But, very happy with my new fence, thanks Randall!
I saved up as I wanted to replace the old fence with something a bit different and had 'an idea'....but couldn't get anyone to take on the project.
Then I discovered Randall, a local Deloraine builder who was willing to take on the job. He spent 4 hours digging a deep trench, through rock & concrete. We ordered some treated pine logs, I marked where I wanted them to be cut at different heights, with the new letterbox (same colour as my studio) in the centre. The logs and letterbox were concreted in. I had some leftover pebbles from my garden so they were used to fill in around the logs.
Unfortunately I live next to a disused factory so the rest of the fence, between us, will have to remain....an eyesore.
But, very happy with my new fence, thanks Randall!
Click on pictures to enlarge.


Snow in Deloraine August 3, 2015.